Skip to Content
Register · Login
About Theme

A Letterboxing Community

Atlas Quest
  1. 0. Carving Menu
  2. 1. Materials
  3. 2. Finding Images
  4. 3. Transfer Image
  5. 4. Carving the Stamp
  6. 5. Mounting
  7. 6. Samples

Stamp Carving 101

Transfer: Parchment Paper Method

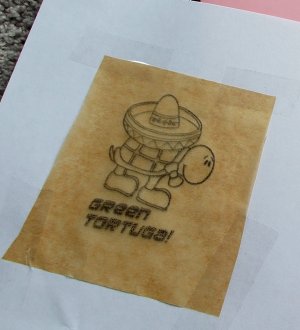
The parchment paper option is quickly growing into one of the more popular ways of transferring an image to your carving block. And why shouldn't it? It's quick, it's easy and you probably already have everything you need to do it right at home! This method of transfer works best with line drawings—large colored areas tend to become blotchy. You might be able to make it work anyhow, but thin lines definitely work best.

Transfer completed
1. Print your image
Parchment paper is difficult to run through a printer since it's so slippery, but backed with a regular sheet of paper, it's not a problem, so we'll start by printing our image to a regular sheet of paper using an inkjet or laser printer. I use an inkjet printer in this tutorial, but I've been told it works just as well with laser printers.
Print image
2. Tape parchment paper over image
We now know exactly where the parchment paper needs to be and how large it needs to be to cover the image. Cut a piece of parchment paper large enough to fit over the image and tape the corners down.
Tape parchment paper over image
3. Print image onto parchment paper
Make sure to orient the page in your printer so it will print on the correct side in the same location as before and change your printer settings to use a draft or normal mode. Too much ink will make your transfer blotchy—when you print on parchment paper, a light touch of ink is needed. Wait for a minute or so for the ink to dry a bit before doing anything else with it.
Print on parchment paper
4. Place parchment paper on carving block
Carefully lay down the parchment paper, printed-side down, on your carving block. The ink on the parchment paper is very wet so you won't have a chance to reposition the parchment paper after your image comes into contact with the carving block.

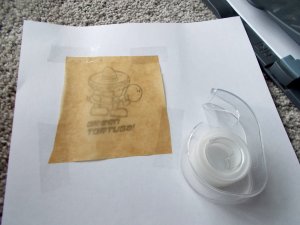
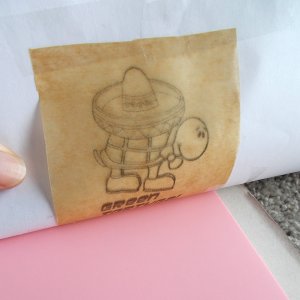
You can remove the parchment paper from the page you taped it to—the parchment paper is easy to see through and can make positioning the image on your carving block easier, but I find the parchment paper likes to curl in on itself is difficult to manage which is why I don't do that, but do what works for you!

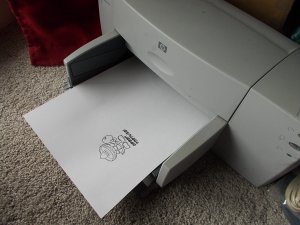
Another option might be to cut down the regular sheet of paper close to the parchment paper—then it still has the stiffness of the regular paper and it's small enough to position easily.
Place parchment paper
5A. (Injet printers) Press image
Carefully press the image on your carving block. Don't rub the back of the image! With a pencil transfer, you have to rub comparatively hard to make the image transfer, but this ink will practically leap off the parchment paper without any help at all and will smear if you try to rub the image. Lightly press or pat the page to transfer the image.
Press image into carving block
5B. (Laser printers) Rub image

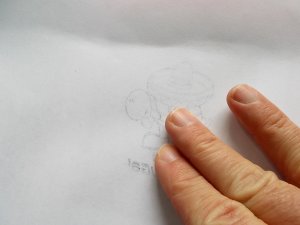
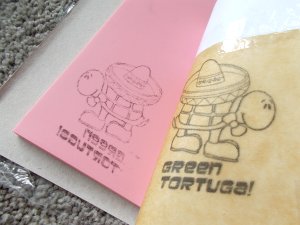
Carefully rub the image onto your carving block. Wassa suggests using the back of a spoon and that "the ink comes off 100% from the parchment onto the rubber. 100%. You are left with blank parchment. It's truly amazing."

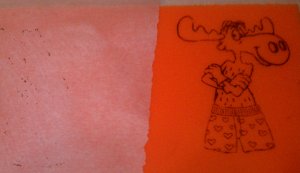
This image was provided by Wassa after rubbing the image onto his orange PZ Kut. (The "blank" parchment paper actually had the image until nearly 100% of it had rubbed off onto the carving block!)

Rub image into carving block
6. Transfer complete!
Carefully remove your printout from the carving block so you don't smudge the image, and voila! You're done!
Transfer completed
Tip!
While designing a stamp, remember that the image you carve will be a mirror-image of what the stamp actually prints—which usually doesn't matter for photos but will be painfully obvious if you get it wrong with text!

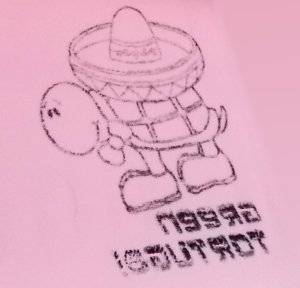
Fortunately, the process of transferring an image will reverse the text automatically for you. In this photo, you'll see the words "Green Tortuga" has been reversed. This is what we want to see happen. Once the stamp is carved and can be used, the stamped image will reverse itself again and look correct.

You'll also see that the text on the transfer is a bit blotchy. This method of transfer works best with thin line drawings and I was pushing things with the large, blocky text. There's just too much ink! I had set my printer to draft mode to use as little ink as I could, but it's still too much for large areas.
Reversed Text
  1. 0. Carving Menu
  2. 1. Materials
  3. 2. Finding Images
  4. 3. Transfer Image
  5. 4. Carving the Stamp
  6. 5. Mounting
  7. 6. Samples
Other Transfer Tutorials