- 0. Carving Menu
- 1. Materials
- 2. Finding Images
- 3. Transfer Image
- 4. Carving the Stamp
- 5. Mounting
- 6. Samples
Stamp Carving 101
Finding Images: How to Turn a Digital Photo Into a Rubber Stamp
by Pungent Bob 


This page is intended to give some guidance on how to use Adobe® Photoshop® to turn a digital picture into a rubber stamp. This technique can be particularly useful for folks who, like me, have better Photoshop skills than freehand art skills. These hints and instructions likely apply to other photo editing software but are geared towards Photoshop since that is what I use.
Depending on the original image, this process can be very easy or may wind up being virtually impossible to obtain acceptable results. More traditional methods will still be preferable for many designs.

1. Acquire a digital photograph
Obtain a suitable digital photograph, e.g., via digital camera or scanner. Large sized, high resolution, high contrast photos tend to work best.

Example original photo (resized for web)
2. Remove unwanted backgrounds
Use selection tools to remove unwanted background and other unwanted parts of the photograph. Save a copy of your work with a new file name in case you want to go back to the original. The magic wand and magnetic lasso tools usually work well for this task.

3. Use the Stamp filter
Choose the Filter -> Sketch -> Stamp... menu option. Click the - (minus) button until the preview shows the entire image. Adjust the Light/Dark Balance and Smoothness sliders to achieve the best result. I've found that Smoothness of 1 typically works best. Light/Dark depends on the image. Click OK when satisfied. If things look really bad regardless of settings, click Cancel and skip to step 5. For other photo-editing software that may not have a stamp filter, you can simulate one by converting the image to greyscale then increasing the contrast and fiddling with the brightness as necessary.

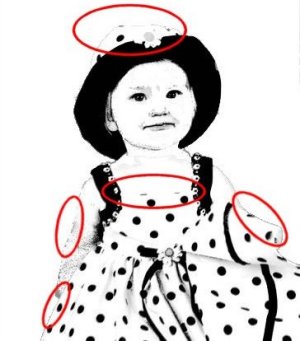
4. Examine image for loss of details
Examine the image for detail loss and note the area(s). If there are none and everything looks good (fat chance!) then proceed to the step 6.
5. Touch up image
Undo the stamp filter to revert back to the photo. Touch up the image using one or more of the following methods. Save your work under new file names often as you experiment so that you can revert back if an experiment doesn't work out.
- Use the pencil or line tool (or other tool) to darken places where there should have been dark lines but none showed after the stamp filter. Use white to remove unwanted detail. This is easy and works best for photos needing little adjustment. Draw in black with a brush size near the size of the desired resulting stamp line width.
- Adjust the brightness and contrast of the photo. You may want to limit the adjustment to selected portions of the photo. Higher contrast helps bring out detail, lower hides detail.
- Use the dodge and/or burn tools to lighten/brighten smaller portions of the photo that need particular help. Dodge dark areas to bring out detail. Dodge light areas to hide detail. Vice versa for burn. This probably works best for hiding unwanted detail.
- If the stamp lines were too large, increase the image size. If too small, decrease the image size. Resize from an original sized image, not from an already resized image. Details can be quickly lost when resizing. Save work often!
- Use Filter -> Sharpen -> Unsharp Mask... to sharpen the image to bring out detail.

6. Resize image
Save your work. Use the print size feature under Image -> Image Size... to change the photo to the size you want your stamp to be.

7. Retouch image as needed
Examine the result. Resizing often leads to image degradation, especially diagonal lines. Use the pencil or other tool to retouch as necessary. Try adjusting the contrast higher to darken any gray areas.

8. Print photo
Print your photo using highest quality print option if you have different options. Transfer to your image to a carving block using your favorite method.
9. Carve your stamp!
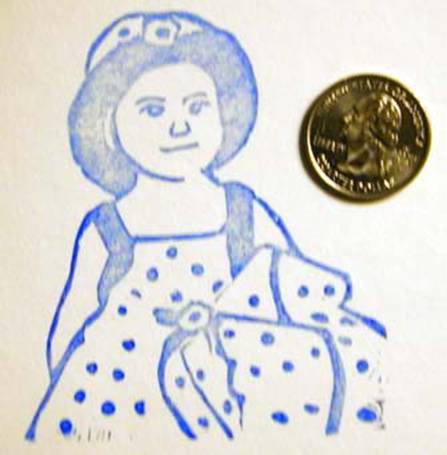
Example stamp image
Adobe and Photoshop are either registered trademarks or trademarks of Adobe Systems Incorporated in the United States and/or other countries.