Logbook Tutorials
Codex Binding Bookmaking Tutorial
Dunhom5
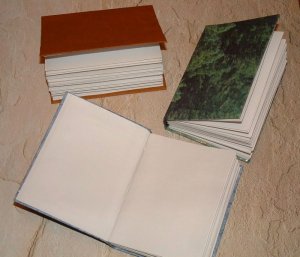
Most modern books use a codex binding where many sheets of paper are sewed together and a cover is wrapped around the book to hide the binding, protect the book, and provide a place to display information about the book. It's one of the more advanced types of bindings you can use for your logbooks, but it's also one of the most professional-looking logbooks you can make.
Your first codex-style logbook will likely take an hour or two to complete, but once you've mastered the steps, you'll be able to whip these books out in 20 to 30 minutes. This is one of the more difficult bindings to learn, so there will be a learning curve involved!
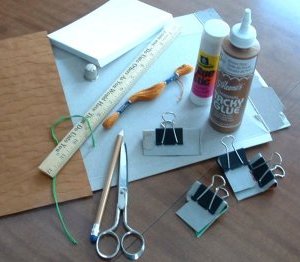
Most supplies for this project are easily found at your local arts and crafts store while many rubber stamp and scrapbooking stores also carry bookmaking supplies. Some materials such as an awl can be found at your local hardware store. And binder clips can be found in your local office supply store.
- pencil
- index cards (4" x 6")
- choice of paper for cover
- heavy thread (waxed is suggested)
- heavy needle
- cardboard (cereal boxes work great)
- scissors
- glue stick
- "Tacky" glue
- ruler
- binder clips (large)
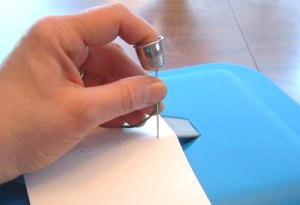
- awl (optional)
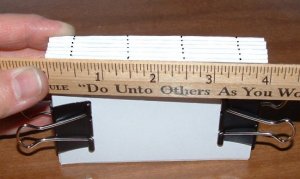
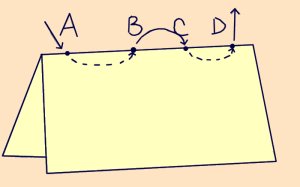
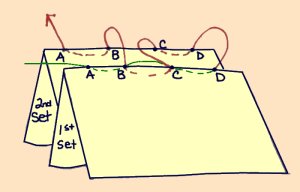
For our 4-inch spine, we'll create marks at ½ inch, 1½ inches, 2½ inches and 3½ inches (from this point on called A = ½, B= 1½, C = 2½, and D= 3½).
Thread your needle with about 5 to 6 feet of thread.
Tie the ends of the thread together in a knot, leaving about a 4 inch tail.
Starting at A, put your needle down through the hole, come up at B, down at C and up at D. Pull thread tight.
Hold second set of cards in back of the first set.
Put your needle down through D2 (second set), up through C2, down through C1, up through B1, down through B2 and up through A2.
Pull your thread tight as possible as you go. Now tie your 'active' thread with the tail left at A1 from Step 5.
Hold 3rd set behind the second set.
Put your needle down through A3, up through B3, down through B2, up through C2, down through C3, up through D3 and hook your thread under the loop at D1 and D2 (where the two previous sets are joined).
Pull your thread tight.
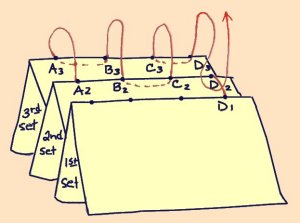
Hold 4th set behind the third set.
Put your needle down through D4, up through C4, down through C3, up through B3, down through B4 and up through A4. Pull thread tight.
Hook your thread under the loop at A2 and A3 (where the two previous sets are joined)
Attach sets 5 and 6 exactly the same way you attached the 4th set by repeating steps 7 and 8.
Pull thread tight and tie off with tail at end of set 6. Make a good knot and cut, leaving about a half inch tail.
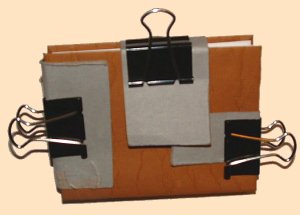
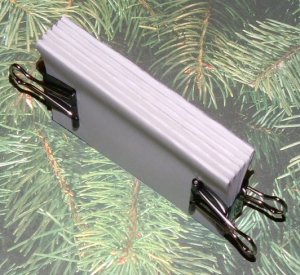
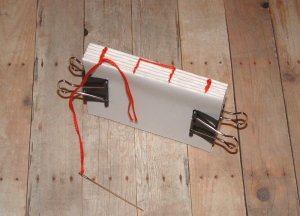
Use your binder clips to hold your book tight.
Measure your "book", add 1/8 inch length and width. Measure the binding, squeezing the binding tight to get a good measurement. (Roughly 3 1/8 x 4 1/8 x 7/16. You want a smaller binding piece).
Transfer your measurements onto your cardboard.
Cut out the pieces as one for now.
Take choice of paper and lay it face down.
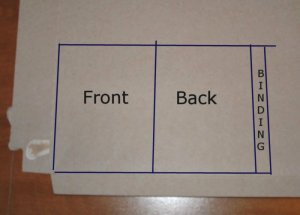
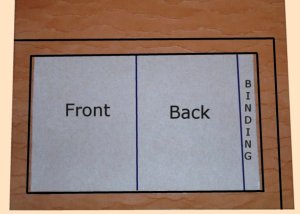
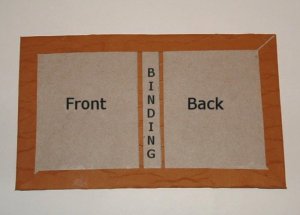
Place your cardboard on top. Leave ½ inch border of paper around the cardboard. Add 3/16 inch to the length to accommodate the fold around the binding.
Cut out choice paper. (Mark your ½ inch borders on the paper).
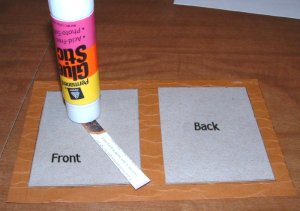
Cut apart your cardboard pieces.
Using your glue stick, glue the front cardboard cover to the back of your decorative cover paper. Use your drawn ½ in. lines for placement.
Do the same for the back cover, gluing to opposite end of your cover paper.
Now glue the spine of cover and place between the front and back covers, leaving equidistant room.
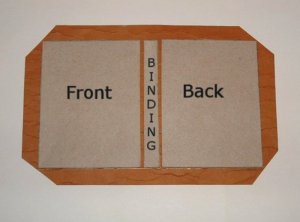
Using the glue stick, glue the edges of the paper, fold them over the cardboard and press down tight.
Fold your cover into a book, creasing the folds well.
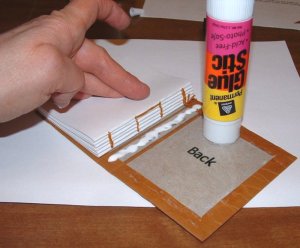
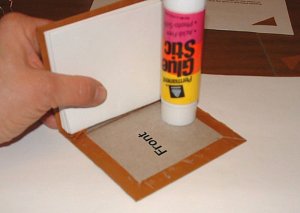
Using your glue stick, glue the front inside cover of your book (cardboard side).
Place pages inside cover, making sure it is tight to back binding. Press front page against cover of book. Press tight. The first page of your first set and last page of your last set will become the endpages of your book.
Apply tacky glue along the cardboard binding of the cover (and only there). Use a glue stick on the back cover of book (cardboard side).
Position page and press tight.