Skip to Content
Register · Login
About Theme

A Letterboxing Community

Atlas Quest

Baking Your Own Carving Blocks

NOTE: This tutorial is a hoax! It was Atlas Quest's 2013 April Fool's joke. Please do not attempt anything you see in this tutorial. If you're interested in reading more about how this hoax was created, read our post on the Great Hoax of 2013.

Have a lot of left over shavings after you've carved? Or even larger chunks that aren't really big enough for your large imagination? Never fear! We've figured out how to reuse them! This tutorial has been more than a year in the making—though admittedly, it's because I never seemed to have enough carving scraps to test on. I've primarily carved in the pink stuff so that's what I had the most of and what this tutorial uses, but I have tried this with small samples of PZ Kut as well which worked but causes the new carving block to be slightly discolored.

There turns out to be an added benefit if you do this with the new pink stuff that doesn't carve quite so well as the old pink stuff—the process of melting and re-hardening the carving blocks seems to give it better carving characteristics more in tune with the old version! Don't ask me why—I'm not a chemist and have no idea how this stuff works—but the results speak for themselves! So don't despair, the pink stuff is BACK! =)

Marjorie helps out!
Marjorie offered to help with this project, but she thought I was creating a carving block bath....
Supplies You'll Need

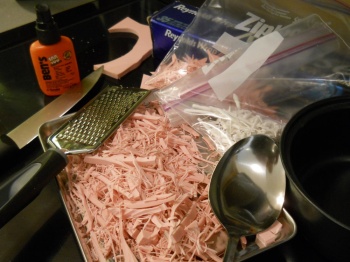
Most of the stuff you'll need for this project you probably have at home, but I would recommend using a dedicated tools for this project. You don't want your carving block to pick up any microscopic food particles that might attract rodents! Amanda found ours at a Japanese dollar store and our total expense was less than $10!

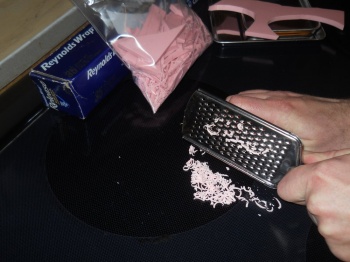
  • cheese grater and/or knife
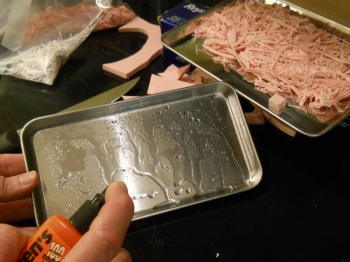
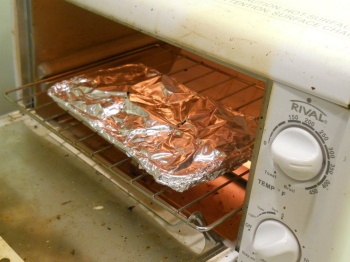
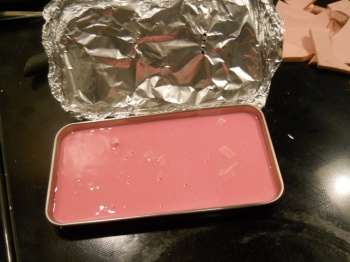
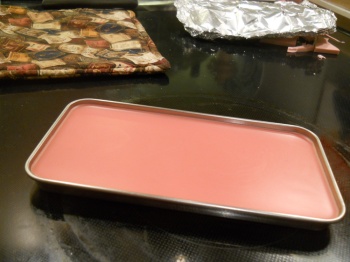
  • small, flat pan
  • aluminum foil
  • spoon
  • bug repellent (make sure it includes DEET!)
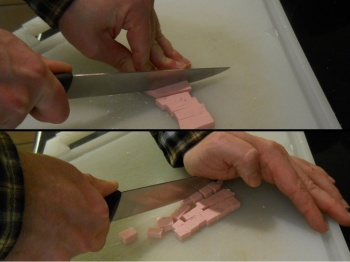
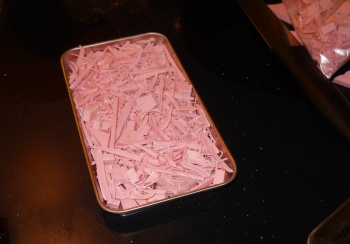
  • lots and lots of slivers and chunks from old carvings (only tested with the pink stuff and PZ Kut—other carving mediums might very well work, but I'm not making any promises!)
Tools of the trade
Step 1A: Grate your carving medium
Large hunks of carving medium don't melt very well and wind up causing a lumpy carving surface, so the first step is to break down any larger chunks into smaller pieces. I've gotten the best results from just grating it in a cheese grater.
Cheese Grater
Step 1B: Chop up your carving medium
Just chopping up the carving block with a knife does work and it's a lot faster than grating it, but it doesn't melt as efficiently. The smaller you can cut them up, the better off you'll be.
Chopping the pieces
Step 2: Use DEET as a cooking spray

Now this is just brilliant. Use DEET as a cooking spray. I don't really know that this will keep bugs and critters away from your carvings, but I figured it can't hurt and it works remarkably well as a food release spray!

IMPORTANT! Do not use DEET on any pan that will be used for food later. Ever. If you don't have DEET readily available, just use any old food release spray such as Pam. (However, it would be a lot more likely that those will attract animals rather than repel them!)

Spray tray with DEET
Step 3: Fill tray with shavings
Fill the tray with your carving shavings. Don't let it overflow the lip of the tray.
Fill tray with shavings
Step 4: Cover with aluminum foil
The carving medium will burn if it's not protected from direct heat, so cover the tray with aluminum foil and poke holes in it with a fork. You don't want the melted carving block to stick to the top of the aluminum foil, though, so be sure to 'pick up' the foil with the fork before removing the tines.
Cover tray with aluminum foil
Step 5: Preheat oven
Preheat your oven to 350°F. I used my toaster oven because you don't really need a whole lot of oven for this. (Sorry the toaster oven looks so bad. It's old and I've been using it my entire adult life, but it keeps on ticking so I keep on using it!)
Preheat oven to 350 degrees
Step 6: Bake carving block
Put your tray in the oven and bake for 45 minutes.
Bake pink stuff
Step 7: Check progress
Carefully pull out your new carving block at the end of 45 minutes. Be sure not to tilt the tray at all—the pink stuff will have melted into a gooey mess and you don't want it to "slosh" around. (It'll have the consistency of thick creme.) In this photo, you can see a couple of the larger pieces that haven't melted very thoroughly as well as a few bubbles that formed on the top.
Check progress
Step 8: Remove bubbles
Remove the bubbles. They don't seem to ever pop on their own at this point, so I quite literally use a spoon to carefully scoop the bubbles out. I initially tried using the tip of a toothpick to pop these bubbles, but they're annoyingly persistent! I did manage to pop a few of them, but eventually I just found removing them with a spoon was quicker and easier.
Remove bubbles
Step 9: Bake 30 more minutes
Put the aluminum foil on the tray again and bake for another 30 minutes. Repeat steps 7 through 9 until the surface layer is completely flat and smoothed over. This will be your carving side. (The other side will likely have a few lumps that are formed from the shape of the tray.)
Bake for 30 minutes
Step 10: Let cool
Let your new carving block cool for at least 4 hours before removing from the tray. I typically just leave it in the toaster oven overnight since it won't get accidentally bumped or jarred there.
Let cool
Step 11: Pop out carving block
Pop out your carving block and you're ready to go! The edges around the rim of the carving block tend to curve up after cooling—the body of the carving block tends to shrink slightly during cooling. Consequently, you can't really carve the outer 1/4" of the carving block. However! You can cut off the edges and remelt them for another carving block!
Pop out carving block
Other Ideas

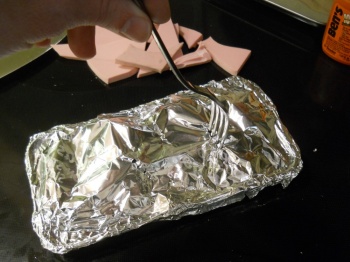
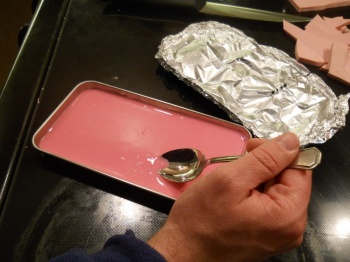
I'm still playing with some ideas, but it's possible to change the color of the carving block by mixing in some food coloring. Just make sure the color you choose is darker than the color of the carving block. White PZ Kut would probably be best for this, but my experiments were always on the pink stuff. Mix it in as best you can with a fork while trying to avoid forming new bubbles.

It's also possible to mix different types of carving mediums together, but that must be thoroughly mixed together. If they aren't well-mixed after they melt, the different types don't tend to bond very well together. It's kind of a hassle, though, so if you have enough to make a carving block out of a single type of material, I'd recommend you do that.

And that's it! It's actually pretty easy and straight-forward to reuse all those left over scraps from your carving sessions and turn them into new carving blocks! If you try doing with with other carving materials, please let me know how it works out so I can add the results here. Thanks!

Oh, Marjorie....
Oh, bother.... *shaking head*